Description
A craft that will model the different phases of the moon
Number of Participants
For any number of participants
Space Considerations
An indoor space where participants can be seated to do a craft
Competencies
- Creative and imaginative thinking
- Eye-hand coordination
- Problem solving
Materials
- Dark blue cardstock (8.5” x 11”)
- Black cardstock (11” x 17”)
- White printer paper
- Black markers
- Full Moon Template
- Phases of the Moon Sheet
- Circle Template
- Pencils
- Scissors
- Foam star stickers (optional)
- Stapler
Preparation
- Print Full Moon Templates
- Print Phases of the Moon Sheets
- Prepare for each participant to have
- Two pieces of blue cardstock
- One black cardstock
- A piece of white printer paper to trace eight circles
- Pencil
- Scissors
- Black marker
- Glue
- One Full Moon Template
- One Phases of the Moon Sheet
- One Circle Template
- Foam star stickers (optional)
- Stapler (can be shared)
Implementation
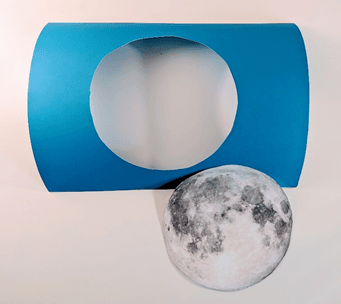
1. Instruct your participants to cut out the Full Moon Template. They will trace the full moon in the centre of one of their blue cardstock pieces, then carefully cut out the circle, as shown below.
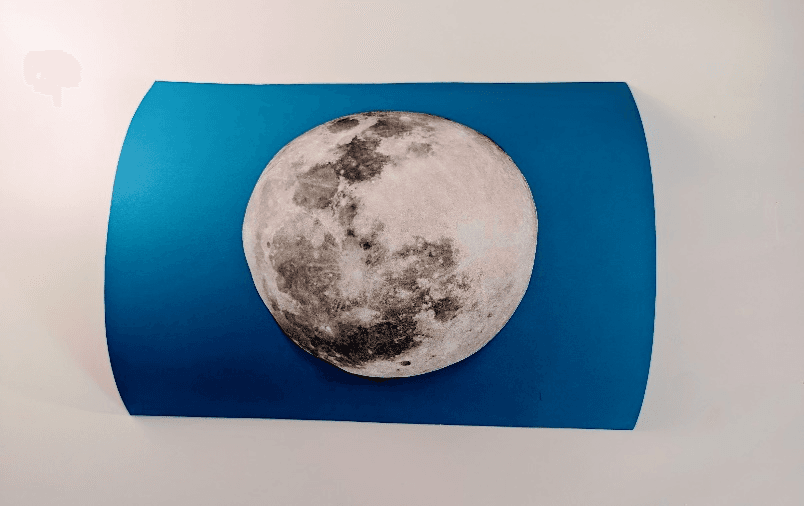
2. The Full Moon Template will be glued to the middle of a second piece of blue cardstock.
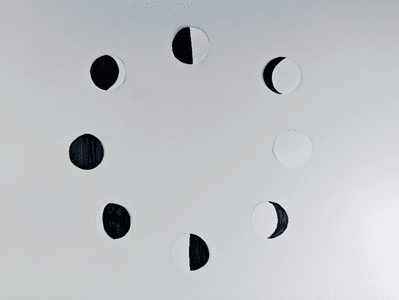
3. Then participants can begin preparing their phases of the moon. Instruct them to reference their Phases of the Moon Sheet to colour in each of the eight circles appropriately on the white printer paper. When they are finished, they can cut out all the circles.
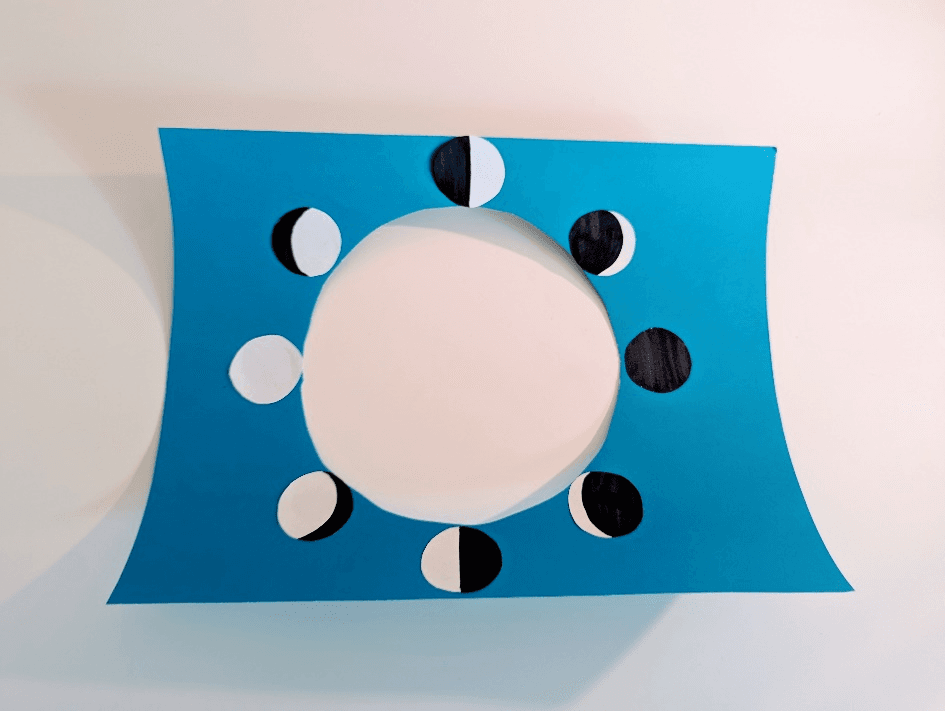
4. The eight phases of the moon will be glued to the cardstock with the hole in the centre, as show below.
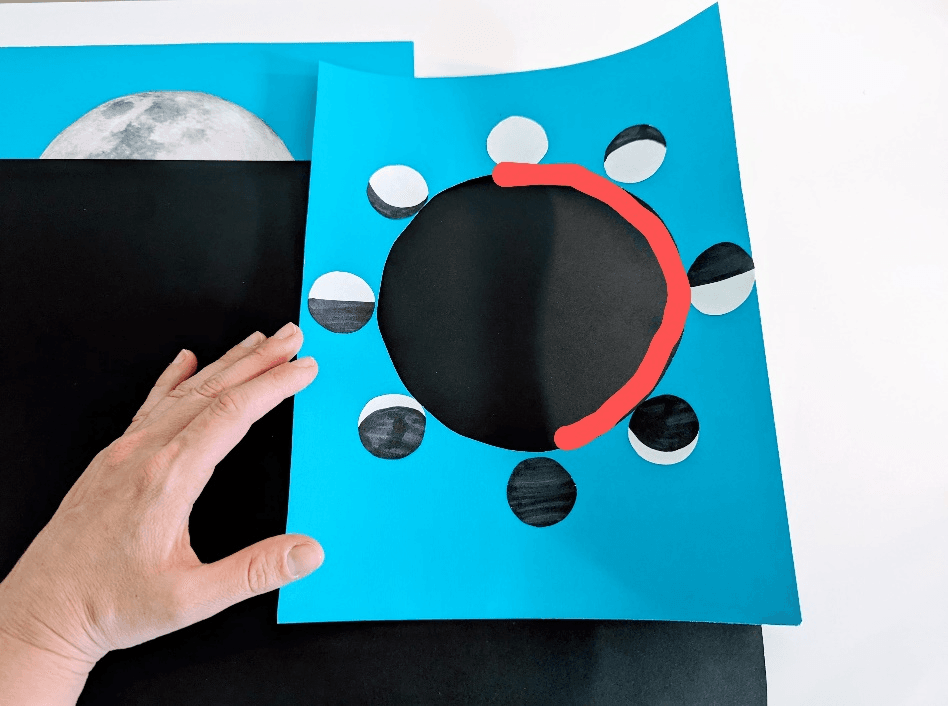
5. Participants will then use the blue cardstock with the hole in the centre to trace a curve on the black cardstock, as shown by the red line below. They will cut out the curve and repeat it on the opposite end of the black cardstock. This piece of black cardstock will be the slider and may require trimming after the next step is completed.
6. The two pieces of blue cardstock will be stapled together with all the edges aligned. The full moon piece will be on the bottom and the phases of the moon piece will be on top so that the full moon appears through the hole in the centre. Optional foam sticker shapes or other add-ons can be useful for hiding the staples!
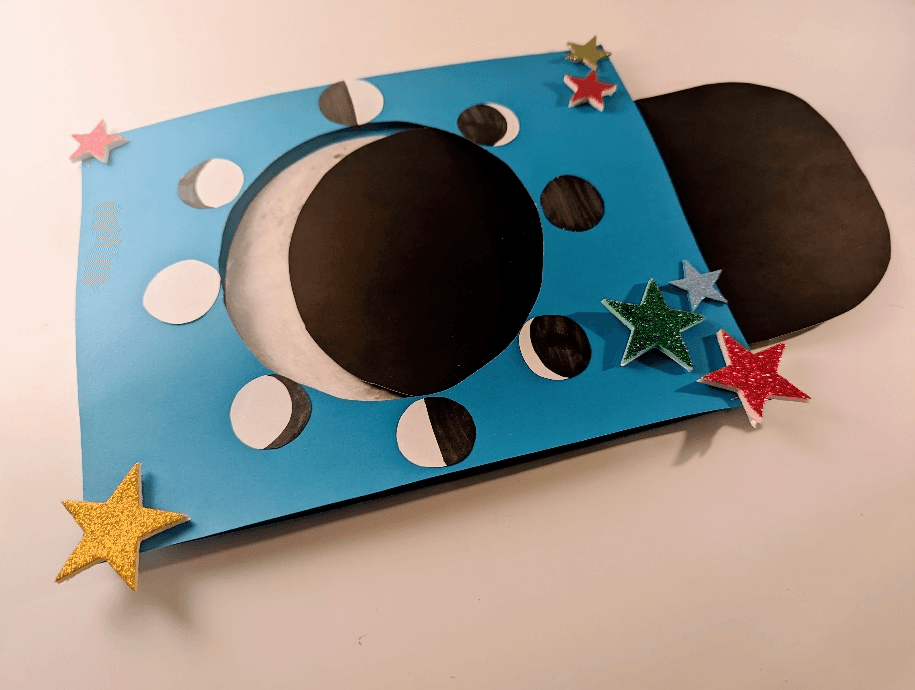
7. Now it’s time for everyone to test their slider. Show your participants how to insert their black cardstock slider in between the two pieces of blue cardstock. As they pull the black cardstock through, they will be depicting the different phases of the moon.
8. Here is a problem-solving opportunity: ask your group how they could depict the remaining moon phases with their slider. Hint: they could cut off a rounded edge and have one side of the black slider be completely straight.
Accessibility Considerations
- Assist participants with cutting and gluing as needed
- Offer easy grip scissors
- Have a couple of the templates already pre-cut
- If possible, print craft instructions in large font
Book Suggestions
A Few Beautiful Minutes: Experiencing a Solar Eclipse by Kate Allen Fox and Khoa Le
Mi’kmaw Moons: The Seasons in Mi’kma’ki by Cathy LeBlanc, David Chapman and Loretta Gould
Saving the Night: How Light Pollution Is Harming Life on Earth by Stephen Aitken
Download Links
Images
